- The default HubSpot lifecycle stages
- How to customize them to fit your business
- The difference between lifecycle stage and lead status
- Best practices for automation, syncing, and reporting
What Are Lifecycle Stages in HubSpot & Why They Matter
Lifecycle stages in HubSpot are a default property used to track where a contact or company is in your sales and marketing funnel. From the initial point of engagement to becoming a customer (and beyond), each stage helps teams understand a contact’s readiness to buy or their relationship with your brand.You might be wondering: What are the lifecycle stages in HubSpot, and how are they different from other status labels?Well, lifecycle stages answer the "where are they in the journey?" question. They’re designed to reflect major transitions—like becoming a Marketing Qualified Lead or moving into the sales pipeline as an Opportunity. On the other hand, fields like Lead Status tell you what’s happening right now within a specific stage, like whether the lead has responded or needs a follow-up. Lifecycle stages are especially important if you're building marketing automation workflows. For instance, a contact moving from “Lead” to “MQL” might trigger a personalized email sequence something we explore deeply in this guide to building automation workflows . Before diving into how to edit or customize lifecycle stages, let’s go over HubSpot’s default setup.
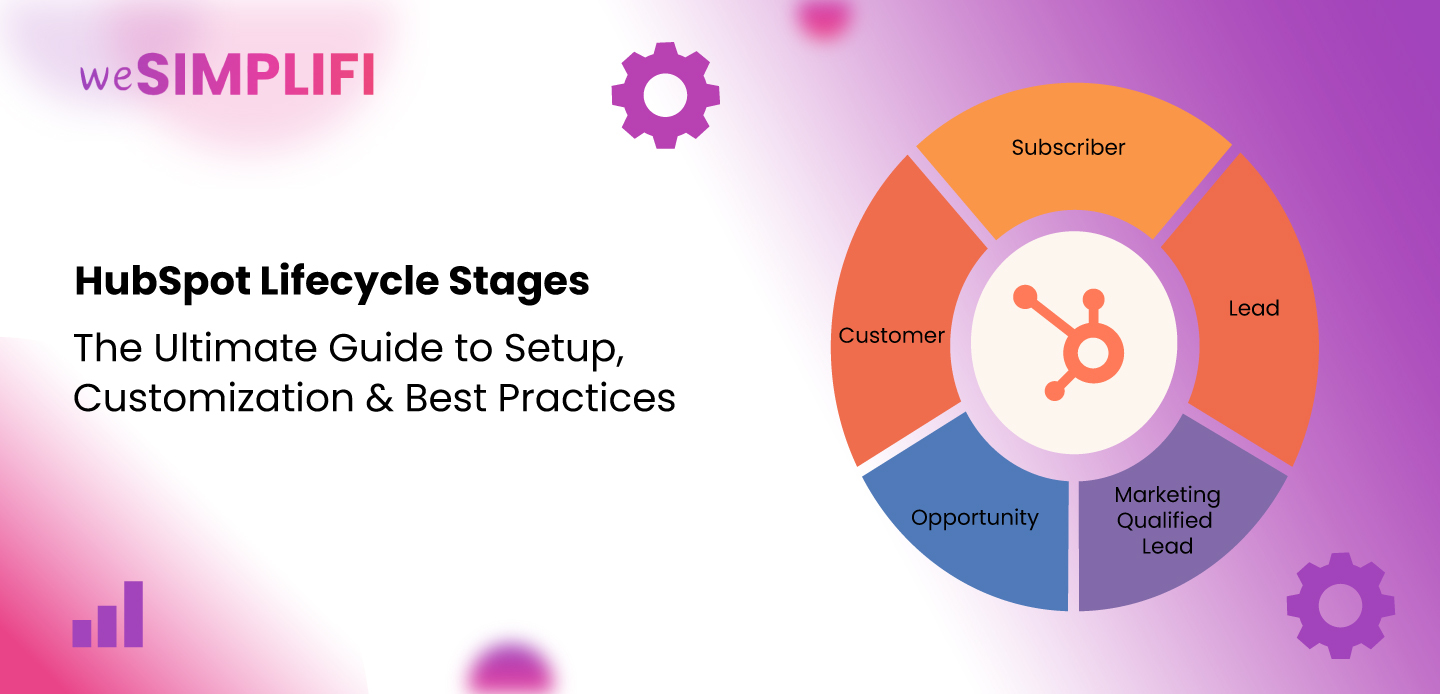
HubSpot’s Default Lifecycle Stages
HubSpot provides a set of default lifecycle stages that cover the full customer journey—from initial contact to loyal brand advocate. These stages aren’t just labels—they help teams segment contacts, personalize communications, trigger workflows, and build more accurate pipeline reports.  Here’s a quick breakdown of each stage and when it’s typically used:
1. Subscriber: Someone who has opted in to hear from you, like signing up for your blog or newsletter. They're not yet a lead, but they’ve shown initial interest.
2. Lead: A contact who has shown some level of engagement—maybe they downloaded a guide or attended a webinar. This is the first signal of intent.
3. Marketing Qualified Lead (MQL): A lead that your marketing team deems ready for further nurturing based on criteria like behavior, engagement, or demographic fit. For example, if someone downloads a pricing guide, that might qualify them as an MQL.
4. Sales Qualified Lead (SQL): A contact that your sales team has accepted for direct outreach. At this point, there’s usually a clear sales opportunity or buying signal.
5. Opportunity: A contact (or associated company) with a deal in your pipeline. This is often set automatically when a deal is created in HubSpot.
6. Customer: As the name suggests, someone who has made a purchase or signed a contract.
7. Evangelist: A customer who actively promotes your brand. This could include referrals, testimonials, or brand advocacy.
8. Other: A catch-all for contacts who don’t fit the traditional funnel—like partners, vendors, or internal team members. These default lifecycle stages work well out of the box for many businesses. But if your sales process is more complex—say, with multiple stakeholders or custom deal stages—it may make sense to go beyond the defaults. Later in this guide, we’ll cover how to customize lifecycle stages in HubSpot to better reflect your own buyer journey.
💡 Pro Tip: Lifecycle stages can also influence how you report on ROI. For instance, when building out a pricing matrix or segmentation strategy, understanding where leads fall in the lifecycle can help you assign the right offers—like we explored when mapping complex pricing in HubSpot.Up next: What if these default stages aren’t enough for your business? Let’s look at how to customize them.
Custom Lifecycle Stages in HubSpot
How to create and manage custom lifecycle stages in HubSpot to match your sales process While HubSpot’s default lifecycle stages work for most businesses, many organizations have unique buyer journeys that go beyond “Lead → Customer.” That’s where custom lifecycle stages in HubSpot come in.Why Use Custom Lifecycle Stages?
Not all leads are the same. You might have:- Channel partners who aren't prospects but need to be tracked
- High-touch B2B leads who go through multiple qualification rounds
- Trial users or freemium customers who need nurturing before converting
💡 Example: A SaaS business might create a custom stage like “Free Trial User ” between MQL and SQL to better track conversions from freemium to paid.Internal workflows—especially for nurturing, lead scoring, or SaaS workflow automation, become far more effective when your lifecycle stages mirror the way your team actually sells. We’ve seen this firsthand when setting up complex marketing automation workflows in HubSpot.
How to Create Custom Lifecycle Stages in HubSpot
Technically, you can’t directly edit the default "Lifecycle Stage" property , as it’s a system property. But here are three proven ways to manage this:1. Use a Custom Property for Lifecycle-Like Tracking
- Create a new dropdown select property (e.g., Custom Lifecycle Stage)
- Add as many stages as needed
- Use workflows to keep this property in sync with behavior
2. Layer Custom Stages with Lead Status
- Use “Lead Status” in combination with lifecycle stages
- Track detailed sub-stages (e.g., “Demo Scheduled,” “Follow-up Needed”)
3. Use HubSpot Enterprise Workflows + Custom Objects
(For advanced setups or developer teams)- Trigger custom logic via workflows
- Create custom objects to track more complex journeys
- Use HubSpot’s API to manage syncing
Best Practices for Custom Lifecycle Stages
- Name stages clearly (avoid internal jargon)
- Map each stage to a business outcome (e.g., SQL = ready for sales)
- Avoid too many stages—it can confuse your reporting
- Keep a mapping doc if using a parallel "Custom Lifecycle" property
👉 You can learn more about this in our guide on CRM migration strategy, where mapping lifecycle stages was a critical step for data integrity.
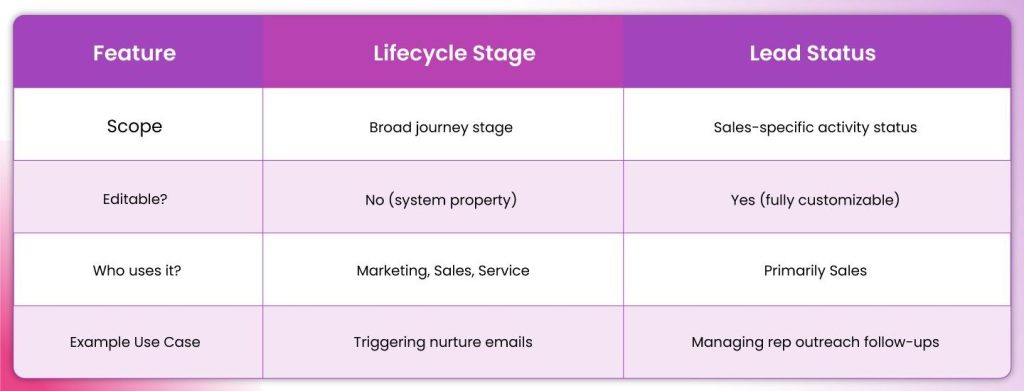
HubSpot Lifecycle Stage vs Lead Status: Key Differences
What’s the difference and when to use each? One of the most common points of confusion for HubSpot users—especially new marketers and sales teams—is the difference between lifecycle stage and lead status . They sound similar, and both deal with contact progress, but they serve very different purposes inside your CRM.Lifecycle Stage: The Big Picture Journey
Lifecycle stages in HubSpot represent the overall relationship a contact or company has with your business. It answers questions like:- Where are they in the buyer’s journey?
- Have they converted from visitor to lead, or from customer to evangelist?
- Segmentation
- Workflow automation
- Revenue attribution and reporting
Lead Status: The Tactical Sales Status
On the flip side, Lead Status is more about short-term sales activity . It answers:- What’s happening with this lead right now?
- Has a rep contacted them?
- Are they open, in progress, or unqualified?
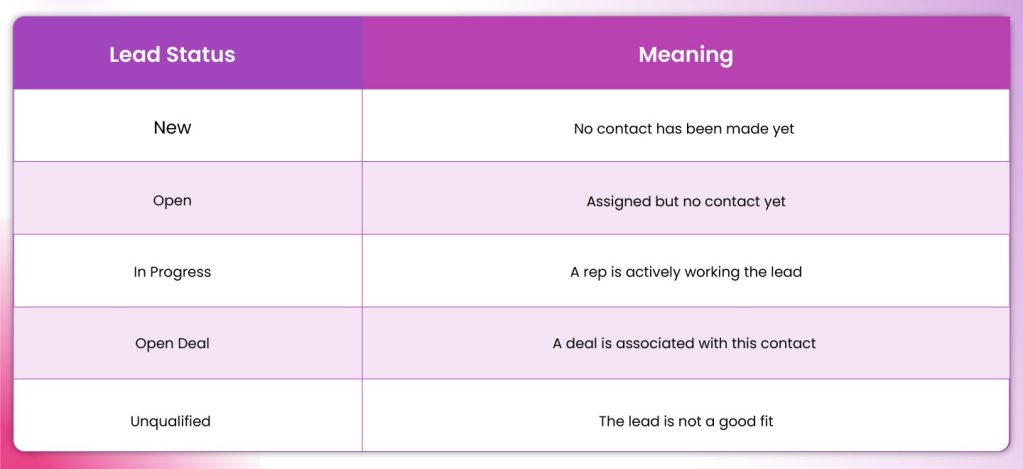 This is especially useful for sales pipeline management , helping reps prioritize their daily follow-ups.
HubSpot Lifecycle Stage vs Lead Status: Quick Comparison
Why You Need Both
If you're serious about pipeline visibility, you should be using both together . Here's how:- Lifecycle Stage tells you where the contact is
- Lead Status tells you what’s happening now
How to Edit Lifecycle Stages in HubSpot
What you can (and can’t) change—and how to work around limitations If you've tried to tweak HubSpot's lifecycle stages before, you might have realized something quickly: You can’t directly edit the default lifecycle stage property. That's right HubSpot lifecycle stages are a system property , which means you can't delete or rename the default options like MQL , SQL , or Customer . But don’t worry there are smart workarounds to help you edit, update, or even sync lifecycle stages in HubSpot to match your actual business needs.What You Can Do
Manually Update Lifecycle Stages
You can manually change the lifecycle stage of any contact or company via:- The contact/company record
- Bulk edit in contact views
- Importing a list with lifecycle stage column
- Workflows (see below)
Use Workflows to Set or Update Lifecycle Stages
Automation is your best friend here. You can create workflows that update lifecycle stages based on:- Form submissions
- Page views
- Lead scoring thresholds
- CRM activity (e.g., deal creation, emails, meetings)
How to Set Lifecycle Stage When a Lead Is Associated in HubSpot
If you’re wondering how to set lifecycle stages automatically when a contact is added to a deal , here’s how:- Go to Workflows → Create a new deal-based workflow.
- Enrollment trigger: “Deal is created” or “Deal stage is known.”
- Add action: “Set property value” → Choose the associated contact’s lifecycle stage.
- Set it to “Opportunity” or another appropriate stage.
💡 Bonus tip: You can also use a similar method when a lead books a meeting or downloads a high-intent asset.
What You Can’t Do (Directly)
- You can’t rename the default stages
- You can’t remove stages you’re not using
- You can’t change the order of default stages
HubSpot Lifecycle Stage Management: Best Practices
- Use workflows instead of manual updates
- Keep the default property clean for high-level reporting
- Map internal stages to HubSpot’s defaults where possible
- Keep marketing and sales aligned on stage definitions (MQL vs SQL especially)
HubSpot Lifecycle Stages Best Practices
Once you’ve understood and set up your lifecycle stages, the next step is optimizing how you use them . Many HubSpot users make the mistake of setting lifecycle stages once—and never revisiting them. But to really drive results, your lifecycle stage strategy needs to evolve with your sales process, marketing campaigns, and customer behavior. As experienced CRM consultants, here are our top HubSpot lifecycle stages best practices to keep your CRM clean, your reporting sharp, and your automation workflows running smoothly.1. Define Stage Ownership Across Teams
One of the most common problems in CRM hygiene is unclear ownership. For example:- Marketing owns Lead and MQL
- Sales owns SQL, Opportunity, and Customer
- Service or success might take over at Customer or Evangelist
2. Use Lifecycle Stages as Workflow Triggers
Lifecycle stages are powerful triggers. Use them to:- Kick off lead nurturing when someone becomes an MQL
- Alert sales when a contact becomes an SQL
- Start onboarding when a deal is marked as Closed-Won and lifecycle changes to Customer
3. Keep Your CRM Clean with Regular Lifecycle Audits
Set a recurring process (monthly or quarterly) to:- Spot incorrect stage assignments
- Identify unqualified leads sitting in SQL or Opportunity too long
- Clean up Other or Evangelist stages, which can get messy if not monitored
4. Don’t Confuse Lifecycle Stages with Deal Stages or Lead Status
Lifecycle stages represent funnel position , while:- Lead status reflects sales activity
- Deal stages track progress through your pipeline
5. Align Lifecycle Stages with Revenue Reporting
Lifecycle stages aren’t just for segmentation—they’re key to measuring marketing ROI. Ask yourself:- How many MQLs turned into customers last quarter?
- What’s the average time it takes for a lead to move from MQL → SQL → Opportunity?
6. Sync Lifecycle Stages Across Systems
If you're using tools like Salesforce, custom CRMs, or external databases, make sure lifecycle stages are properly synced either through native integrations, middleware, or HubSpot APIs. Many developers ask: “How do I sync lifecycle stages in HubSpot with external platforms? ” The answer: Use workflows where possible, or custom APIs if you need precision. Just make sure the mapping is documented and tested regularly.Conclusion: Mastering HubSpot Lifecycle Stages for Success
Understanding HubSpot lifecycle stages is essential for streamlining your CRM, optimizing marketing automation, and improving sales and customer relationship management. By implementing best practices and strategically leveraging lifecycle stages throughout your processes, you ensure your team is always aligned and your data is clean and actionable. Here’s a quick recap:- Lifecycle stages represent the overall journey of your contacts, from initial interest to becoming an advocate for your brand.
- You can customize stages to fit your unique sales process and workflows, helping your team better manage leads and opportunities.
- Best practices include clear stage ownership, workflow automation, regular audits, and syncing with external systems.
- Don’t forget the value of regular lifecycle stage reviews to refine your processes and adapt to new insights.
FAQs About HubSpot Lifecycle Stages
Q1: What are the lifecycle stages in HubSpot?
HubSpot’s lifecycle stages are predefined stages that track a contact’s journey, including Subscriber, Lead, MQL, SQL, Opportunity, Customer, and Evangelist. These stages help align marketing, sales, and service efforts.
Q2: What are the 5 stages of the customer lifecycle?
The five general stages are: Awareness, Consideration, Decision, Retention, and Advocacy. HubSpot’s lifecycle stages align with these stages to help track progress.
Q3: What’s the difference between lifecycle stage and lead status in HubSpot?
While lifecycle stages represent the broader funnel (e.g., MQL, SQL), lead status reflects specific sales activity and contact status (e.g., Open, In Progress). We covered this in detail in our HubSpot lifecycle stage vs lead status section.
Q4: How do I set lifecycle stage when a lead is associated in HubSpot?
You can set lifecycle stages automatically via workflows when a contact is linked to a deal or takes a specific action (like booking a meeting). Refer to the how-to workflow section for detailed steps.
Q5: Can I create custom lifecycle stages in HubSpot?
Yes! You can create custom properties for lifecycle-like stages or use workflows to automate stage changes based on behaviors. We detailed this process in the custom lifecycle stages section.